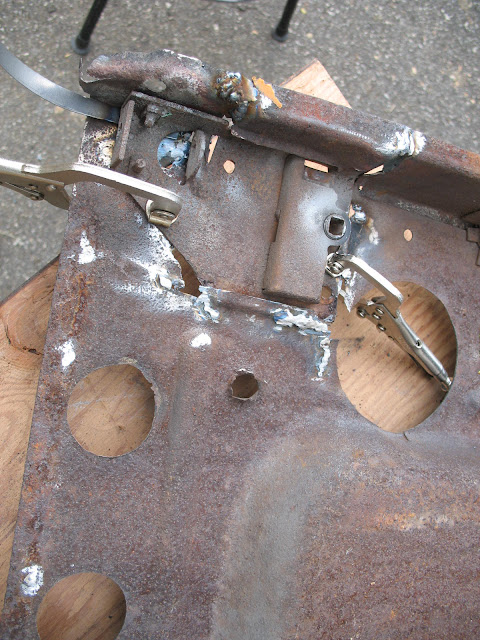
Using the new door skin as a template, I started making a new bottom for the inner door panel that was rusted away.
The first picture shows the new 22 ga. panel being shaped to fit and tack welded in place.
The second picture is the old latch that was welded in to the old door being used as a template to locate mounting holes so a new latch pocket could be constructed. There is no adjustment here so it has to be exact.
The third picture shows the new inner door bottom finished and ready to crimp the new skin over the flange on the bottom.
The fourth picture is the new door skin being crimped over the new bottom flange.
The fifth picture shows the hinge side being crimped. All crimping was done with hammers and dollies so I could control the edge of the crimp and keep a nice crisp line.
Picture six is the latch side being crimped. I installed the hinges before I started crimping and as I started the crimp on each side, I hung the door so I could see how the reveal was working out.
Picture seven shows the door hanging on the car from the hinge side.
Picture eight show the door's latch side.
Picture nine show the doors fit from inside the car.
Picture ten shows the door hung from the outside.
Overall the fit was better than I expected as I had heard the new door skins required a lot of tweaking to get them to fit correctly. Thankfully this was not the case. It only took a few hours to get the new skin on, but it took many hours of welding and a tank of argon to get the old inner panel in good enough shape to reuse. The "D" nuts for the latches and check straps were gone so they all had to be installed.
Picture eleven shows the fit at the front windshield support post. It took a lot of fitting to crimp this compound curve. Lots of light taps with a good fitting dolly under each tap and it folds over like butter.
Last pic is the fit at the beltline where the side curtain hardware goes. This will have to have some more tweaking but fits pretty well. Actually the quarter panel has been dented at the beltline and will have to be worked to match the new door skin. But the quarter panel is coming off next to weld in the patch panels. Then I will start on the passenger side doing the same thing there.
I primed and painted the inside of the new door skin and coated the inner panel with a rust inhibitor before putting them together. Between the two panels originally was a pad of paper filled with excelsior to keep the two panels from rubbing together, however it held moisture and caused rustout. I used a thin sheet of closed cell foam instead. Picture nine, above, shows the two tabs that hold it in place (the two white spots in the center of the door panel.)


