1931 Ford Model A Roadster

1931 Ford Model A Roadster

Friday, January 22, 2016

Snow Day

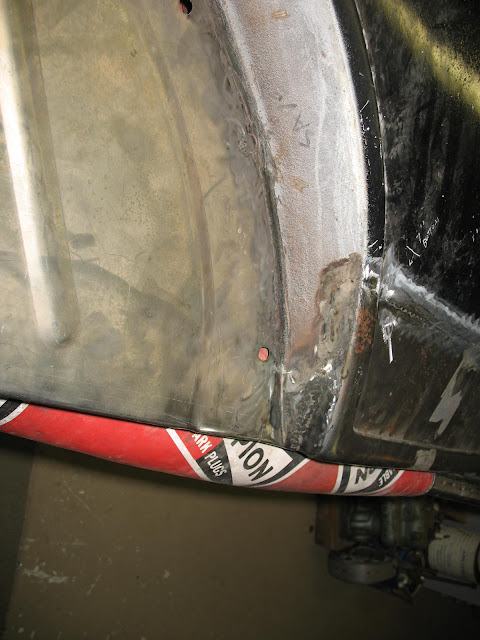
 I don't usually weld inside but  it's snowing and cold so I moved work inside today.  I also don't usually show my mess, but this is what I used today getting the damn welded in door latch out and  starting to make a new latch pocket.


Thursday, January 21, 2016

Quarter panel and door work

 After I got all the patch panels welded in the quarters and new metal primed, I started removing the paint, primer, and bondo from them to see what kind of shape they were in. The right rear looks pretty good with only some dings and dents.  The panel below the rumble lid was full of bondo and dents, will take lots of work! The drivers door was full of bondo and major dents but no rust or rot like the other door. The hinges and latch are welded in and will have to be cut out. I may take the skin off just to make it easier to straighten.  If it's nice tomorrow I'll finish with the paint and bondo removal.


Thursday, January 14, 2016

Back quarter panel installed

 I finally got the last patch panel installed in the right quarter panel today.  It took a lot of cutting and shaping to make the new piece fit but it finally came together. I attached the  rear triangle brace to the quarter for reference and then tacked the patch in place. The  beads didn't line up from the old to the new so I cut a  section out to blend it better. After much welding I bolted the panel to the car to check the fit since so much had been replaced on this side.  Everything lined up well except the bottom of the patch but I will shape it to fit when I do the hammer and dolly work to get all the dents out of the fenders. Now I can sand and prime the parts before I start on the passenger door. No more rust!


Monday, January 11, 2016

A Riveting Day

Today Harry came over to help me rivet the floor panels in the roadster along with the subframe and cross channels.  We riveted all we could reach while the body was bolted to the frame to keep everything square.  After we had done all we could get to that way, we removed the body from the frame and stood it up on the cowl and finished the rest.  Then we bolted it back to the frame in preparation for attaching the quarter panels as soon as I finish the last patch on the right side.


Friday, January 8, 2016

More Right Rear Quarter Repairs

After welding in the wheel well panel and the quarter patch panel there was a gap between them that was part of the rusted out panel.  This is not available so you have to make your own.


Picture one shows the piece I made to fill in the gap and picture two shows it welded in place.


Picture three and four show the outer and inner sides of the panel after welding is finished.  Next I have the very end of the panel to replace and I'll be done with the welding on the quarter panels. 


Wednesday, January 6, 2016

More Right Rear Quarter Panel

Today I cut out the old wheel well as shown in the first picture.


I left the fender bolts attached to the quarter panel with small tabs to locate the new wheel well to be sure everything would fit precisely.  Next I positioned the new panel and tacked it in place using the fender bolts as a guide.


After tacking in place I trimmed the tabs off one at a time and welded all the way around.  After welding and metal finishing I will weld the bolts back in place.  If I had left them attached to the tabs the new panel would not have fit nice and flat when I welded the panel in.


Picture three shows the quarter panel cut out and the new panel tacked in place.


Picture four shows the outside of the quarter panel with the wheel well and quarter patch tacked in.


Picture five shows a piece of metal I am shaping to back up the horrible crack that was left after I removed all the old brass weld.  This will be tacked in place as a backup and the crack will be filled and welded from the outside.


Picture six shows the quarter from the inside after tacking.  Now I will finish welding all the seams and grind them flat and it will be good as new.  Soon no more rust on this panel!


Tuesday, January 5, 2016

Right Rear Quarter Repairs

Since I finished metal repairs to the driver's quarter panel, I decided to take off the passenger side and start working on it.


Picture one shows the rotten bottom and rear corner, much worse than the other side.  I have it marked where to cut out for the new steel patch panels.


Picture two shows the inside where it attaches to the rear panel.  Someone took a torch and a drill to it to remove it from the car without much thought to putting it back together again.  


Pics three and four show the bondo and screen wire holding this panel together.


Pic five shows the top of the panel just behind the side of the seat.  It had cracked several inches down due to the fact that there was no support since the subrails were rotted and gone.  It had been repaired by beating in the crack and brazing  it and filling with bondo.


Pic six shows someone's idea of a brace to keep it from cracking again.


Pics seven and eight show the crack with the bondo and brass brazing ground out.  You can't weld it back correctly without removing all the brass or the new weld won't stick.  There is a large crack now that will have to be filled and welded now that it has the brass removed.


Pic nine shows the inside  of the crack with the old brace removed and the inner panel welded back together to support the metal skin.