1931 Ford Model A Roadster

1931 Ford Model A Roadster

Saturday, April 30, 2016

Inner and outer rear panel installation

 I finally got the rear body panel and curved inner panel, rumble stops, rumble stop braces and rear spare tire carrier brace installed today. This was the toughest fit so far.  39 holes had to line up exactly to bolt it together and since the riveting is done it was tight.   But at the end of the day everything fit  together. 


Friday, April 29, 2016

More Body Work

 After we got all the rivets in, the new bottoms of the quarter panels had to be  crimped over the subrails and welded in place. Walt let me borrow his spotwelder which worked like a champ.  Since the Roadster chassis is now running, I've had so many requests for rides that today I added an extra seat for any brave soul that wants a ride!


Thursday, April 28, 2016

Roadster's First Run Today!

 Burned up the neighborhood today in the hot roadster! The neighbors took the pictures. So much fun.


Wednesday, April 27, 2016

Final Riveting Day

 Harry finally finished his house project so he could come over and help finish the riveting.  I had the body back together with tiny bolts waiting until he could come over and help rivet. One of us has to buck the rivet and the other one run the gun so we swap off a lot.  I took all day but we finished her up, then took it off the dolly, stood her on her nose and sanded and primed the bottom panels and riveted parts.   A good day thanks to Harry!   


Tuesday, April 26, 2016

Cowl on today

 I'm getting closer to test drive time and I needed some way to support a gas tank, radiator,  the temporary steering column,  the coil and wiring and choke rod.  Then I remembered I had a spare cowl on the trailer in the back yard so I installed it today.  Radiator is now supported, steering column supported, choke rod installed.  I will put new gaskets and float on my gas tank and install it in the cowl and I can check out the tank before paint to be sure it doesn't leak. Tomorrow I will get new battery cables and coil wiring done.  Walt gave me new spark and gas rods so they are installed also.  More tomorrow.


Sunday, April 24, 2016

Roadster Progress

Today I got finished with the brakes. 


The first picture is the service brake and emergency brake cross shafts and arms installed  with the brake rods. 


The next picture is the brake rods going to the rear wheels, one is service brake and the other rod is emergency brake. You can also see the  brake return springs attached to the rods.


Third picture is the battery installed in the car and the pedals and linkage around it. As you can see there is a lot there and that is why I waited to get the body together before I put the running gear in or I would have had to try and rivet around  it all.   


The car didn't  have emergency brakes when I got it. Walt gave me a brake handle and I fabricated the bracket to attach it to the transmission and all the linkage to hook it up.  The next picture shows the linkage attaching the hand brake and the support for it. You can also see the brake light switch coming out of the crossmember on the drivers side.   


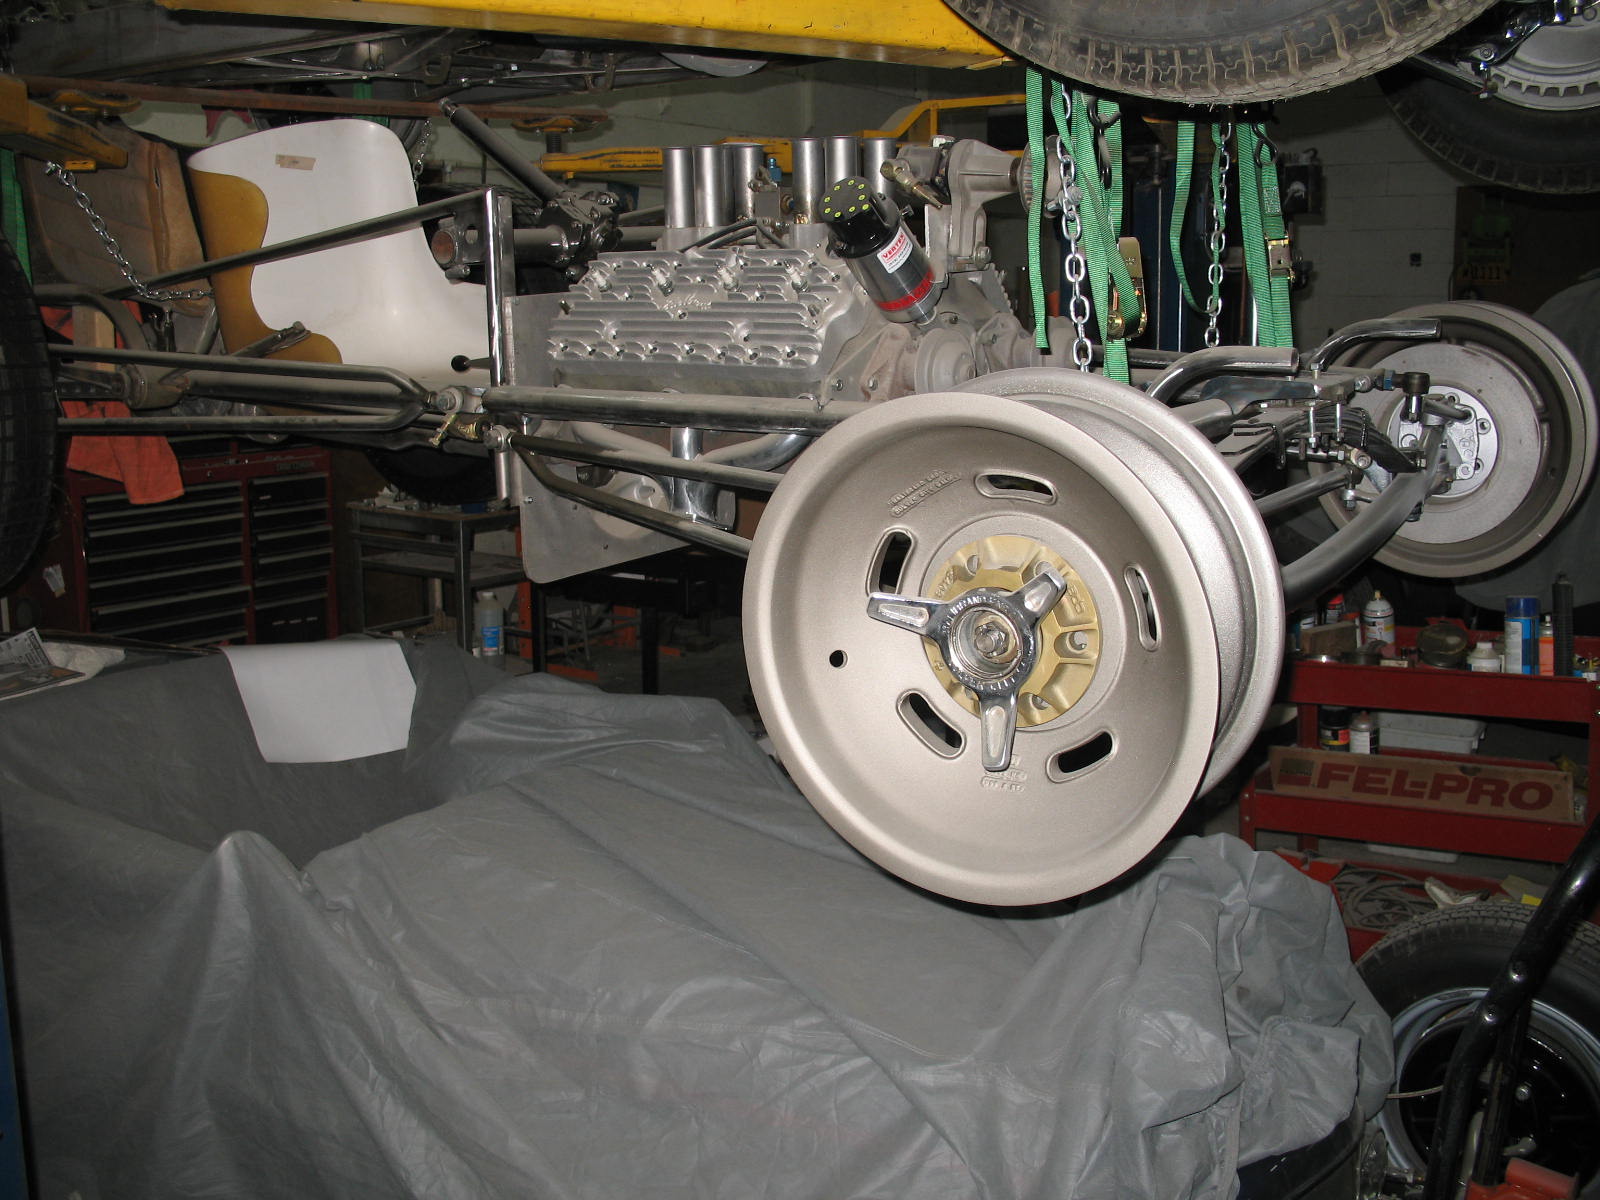
The last picture shows it all together with the exhaust system and radiator  in place.   Next I have to do some temporary wiring and fuel system so I can test drive it.

Saturday, April 23, 2016

Overdrive Shifter Bracket

When I got the overdrive and shifter in all looked good until I installed the brake and clutch pedals and linkage. Then I realized the model A bracket that comes with the overdrive won't work on a B model transmission. So after fabricating a bracket to hold the shifter, the shift arm was in the way of the brake rod.  So after scratching my head a little I machined off part of the bracket and reversed the arm and had just enough clearance to work. So I installed the brake cross shaft and got ready to hook up the brake rods to each wheel.  I also put in the battery box to see if I still had clearance. It's tight but it works!


Friday, April 22, 2016

Overdrive is in

 Finally got the drivetrain put back together.  Tomorrow, make the linkage for the overdrive shifter.


Thursday, April 21, 2016

Engine and Transmission In

 Now that the body is out of the way, I put in the engine and transmission today.  


Wednesday, April 20, 2016

The body is off!

 Today I got the body off the frame and onto the body dolly. Now I can finish the riveting and  final body work.


Tuesday, April 19, 2016

Finished the triangulated lifting brace!

 Tomorrow the body comes back off the frame and on to the body dolly to finish riveting and  to complete the body prep for paint.   I  made a diagonal brace to keep everything aligned for lifting and riveting.  Without it the body could easily distort at the door openings.


Monday, April 18, 2016

New Back Window

 Getting ready to order top fabric to build a new top for the roadster. I found a set of used top irons from a friend in SC but was missing the back window frame. Walt found one in his stash of goodies but it was painted red and covered in rust. I took it apart and took the red off with paint remover and realized there was some chrome still there.  After a few hours of sanding and priming the back side looked great. Then I put the outside on the buffing wheel with some white rouge and  the chrome came back like new.  Thanks Walt! 


Saturday, April 16, 2016

Quick Change School Part 1

 Today I went to quick change school. Through connections at the Race of Gentlemen I was able to meet a very famous race car builder now retired and in his eighties  who agreed to spend the day with me showing me how to set up quick change rear ends. I learned so much about rear ends, suspension, fabrication steering, axles... I'll be going back for more another day!